

Our editors have independently chosen the products listed on this page. If you purchase something mentioned in this article, we may earn a small commission.
September 11, 2022 — 11:34 AM
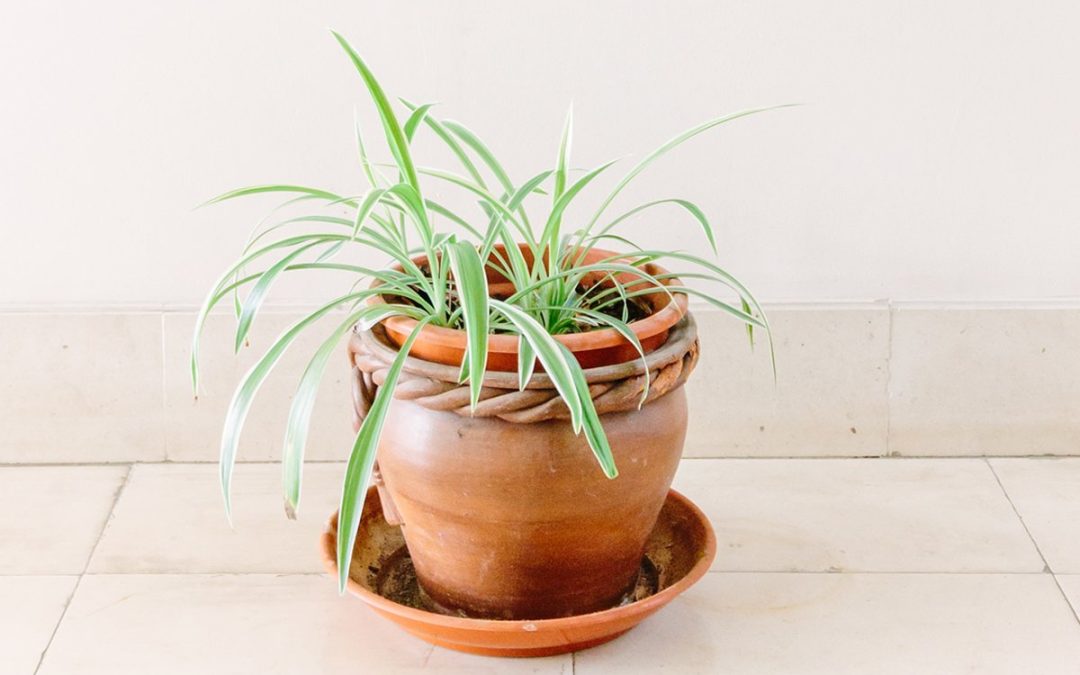
Prepare to actually want to have spiders in your living room. The spider plant (Chlorophytum comosum) is a delicate-looking houseplant with thin leaves that resemble spider legs. We reached out to four plant care experts to learn all there is to know about keeping the creepy crawler happy and vibrant.
The spider plant, also known as the ribbon plant or spider ivy, is best known for its unique appearance and funky growth pattern. As healthy plants mature, their long leaves produce their own little “spiderettes.” Once these baby spider plants dangle from the mother plant, they can be removed to be propagated and grown on their own. (More on that below!)
You can also tell a spider plant from its tell-tale thin, grass-like leaves that come in beautiful variegated patterns. The Chlorophytum comosum ‘Vittatum’ has leaves with white/yellow centers with green outlines, while the Chlorophytum Comosum ‘Reverse Variegatum’ leaves have green centers with white/yellow outlines. The Chlorophytum Bonnie’s leaves come out hilariously curly. When a spider plant is happy, these leaves will grow very quickly.
Native to the coast of West and South Africa, the spider plant is relatively hardy and can withstand a wider range of temperatures than some other popular houseplants. “Spider plants are fantastically adaptable and will tolerate a range of conditions indoors,” says Brooke Blocker, the founder of houseplant shop Outside In.
That being said, Karen Hugg, gardener and author of Leaf Your Troubles Behind, says that they wouldn’t be at the top of her list of easy-care varieties. “The only reason is that spider plants like to be moist; they don’t want to be wet, and they don’t want to be dry,” she says. So you should know your way around a watering can before bringing one of these coastal plants into your space.
- Best place to put it: Near an east- or west-facing window
- When to water: When the top few inches of soil feel dry
- Pros: Unique growing pattern, easy to propagate
- Cons: Prone to brown leaf tips, requires careful watering
- Pet-friendly? Non-toxic to cats and dogs
- Size: Grows outwards, and leaves can get up to 12-15 inches in length
probiotic+
Tackle your gut issues now, so you don’t have to think about them later.*

“Generally speaking spider plants should be watered once the top few inches of potting mix has dried out,” says Blocker. You can tell whether your plant needs a drink by using a soil moisture meter or simply sticking your fingers in its soil. If it’s dry, give the plant a good drink and allow any excess water to escape out of the drainage hole. Be sure to toss any water left in the pot’s saucer afterward, since your plant will be unhappy sitting in it.
“These houseplants are sensitive to overwatering (which can cause irreversible damage), so when in doubt, less is best,” say Lauren Camilleri and Sophia Kaplan, authors of the upcoming book Bloom: Flowering Plants for Indoors and Balconies.
As for how often you’ll need to water, Blocker says it really depends on where your home is, how much light your plant is getting, and the time of year. Brush up on your skills to ensure you’re always getting watering day just right with this comprehensive houseplant watering guide.
“A moderate to bright spot with indirect sunlight is best for spider plants,” say Camilleri and Kaplan. “Too much harsh sun exposure can cause scorched leaves while too little sunlight can cause the plant’s health to decline. Spider plants thrive in that sweet spot, usually near an east- or west-facing window.”
If your plant’s leaves are drooping, it might not be getting enough sun. Move it closer to a window or place it under a grow light. If the leaves look light in color—almost like they’re getting scorched—it’s a sign they’ve had too much sun and should be moved further away from your light source.
Spider plants will be content in a wide range of conditions (though they don’t love sudden temperature changes). If your home is comfortable for you, chances are it’ll be good for your spider plant too.
Since spider plants hail from tropical regions of Africa, they do prefer more humid conditions. “You can spritz your plant to add humidity,” says Blocker, while Hugg prefers to set her plants up near a humidifier.
Spider plants will grow in any well-draining potting soil mix. If you want to make yours really happy, add some extra perlite or coconut coir to provide even more drainage. You don’t need to give it too much fertilizer (it grows quickly enough without it!) and 1-2 applications during the spring/ summer growing season should be plenty.
Since spider plants are such quick growers, you’ll need to watch out for signs they’ve outgrown their pot, like roots peeking up from above and below their soil. Expect to repot them in fresh soil about once a year, preferably in spring.
How to propagate a spider plant.
“Spider plants are one of the easiest and most fun plants to propagate,” note Camilleri and Kaplan. When you spot those little spiderettes, or plant pups, dangling from your mother plant, here’s all that’s left to do to turn them into new full-sized spiders:
- Wait until the pup has grown a bit and started to develop its own root system. (The roots will look like little strands coming off the bottom of the plant.)
- Use a clean pair of scissors to cut the pup off its mother plant, keeping its roots attached.
- Place the pup in a small pot (with a drainage hole) filled with well-draining soil. Put it in bright, indirect light and give it a good watering.
- Make sure that the pup’s soil stays moist for the first 1-2 weeks while it gets used to its new home. Placing a plastic bag over it can also help trap some humidity. With any luck, your plant will start to grow from there!
- Alternatively, if you don’t have success putting your pups in soil right away, you can let them root in water first. Position the spiderette in a clear glass jar filled with distilled water so only its roots are submerged. Wait 1-2 weeks for its roots to grow (changing out the water whenever it looks murky) and then place it in soil and start from step 3.
Here are some final tips for keeping your spider plant looking healthy and growing strong enough to produce pups.
- Don’t ignore brown tips: If your spider plant’s leaves develop brown tips, that’s a super common sign of distress. The green thumbs interviewed for this article agree that this is most often a sign that your plant needs more water. “It could also be over-fertilized,” adds Hugg.
- Be choosy about water: If the tap water you use to water your spider plant has too much of certain minerals, it could also cause brown spots to form on leaves. Blocker recommends using distilled water instead.
- Keep its pot snug: Want to encourage spiderettes? Make sure your plant sits snug in its pot. If it’s in a pot that’s too big, it will direct all of its energy towards filling it out and none will be left over for making those babies.
- Bring it outdoors: Spider plants can be a pretty addition to your garden too, and they’ll thrive as a perennial in USDA Hardiness Zones 9-11. If you live in a cooler climate, you can also start them indoors and keep them as annuals.
Spider plants can add a lot of fun and dimension to your houseplant collection—especially once they start growing spiderettes. Just make sure you’re watering them properly and moving them to a new pot as needed. Place yours next to a statuesque snake plant to keep the creepy crawly theme going.
Want to learn how feng shui can help you create a high-vibe home and set powerful intentions to manifest your dreams? This is feng shui the modern way – no superstitions, all good vibes. Click here to register for a free session with Dana that will give you 3 tips to transform your home today!