
A classic standing posture, triangle pose is found in many traditional styles of yoga, including ashtanga yoga and Iyengar yoga. Known as trikonasana in Sanskrit (triko = triangle; asana = pose), triangle pose involves a lot of moving parts.
“Trikonasana is a pose that looks incredibly simple, but actually takes a lifetime to master,” says Stephanie Saunders, vice president, fitness programming at BODi and a certified yoga instructor. “And beyond the different stance and arm positions you can use, muscle tightness and joint restriction can change the pose from day to day.”
Triangle pose is also known by its full Sanskrit name of utthita trikonasana, or extended triangle pose (utthita means extended). You’ll often hear teachers shorten it to trikonasana, but the full and abbreviated names are used interchangeably.
Triangle Pose: Step-by-Step Instructions
You have to be a good multitasker in triangle pose. You’re creating a side bend/spinal extension, stretching your hamstrings, strengthening your quads, and resisting gravity with your head, neck, and arms — all without losing your balance. Whew!
- Stand tall in mountain pose — chest up, big toes touching, heels slightly apart — near the top of your mat.
- Step your left foot back about 3-4 feet as you rotate your torso to your left, extending your arms out to your sides in a T formation.
- Point your right toes toward the top of your mat, and position your left foot at 45 degrees. Line up your front heel with the arch of your back foot.
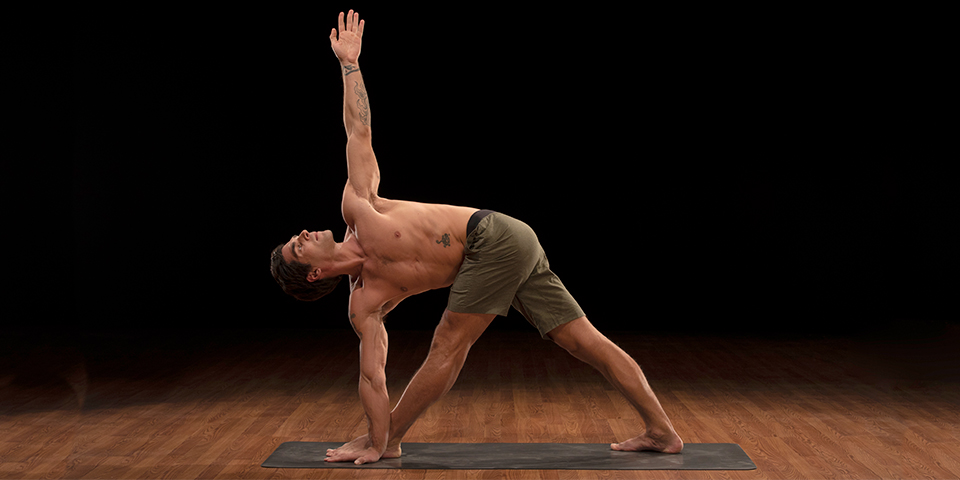
- Straighten both legs, externally rotating your front leg slightly, and hinge at your hip to lean your torso over your right leg without rotating or bending at the waist.
- Lower your right hand to a block or the floor, inside or outside your right foot, and reach your left hand toward the ceiling.
- Gaze up toward your left hand, and hold for five breaths or longer. Focus on keeping your chest open (think: wide collarbones).
- Inhale and rise back up to standing, your arms still forming a T.
- Switch sides by turning your feet — left foot pointing to the back of your mat, right foot at a 45-degree angle — and repeat.
How to Make Triangle Pose Easier
A common cue for triangle pose is to imagine yourself between two panes of glass. While that image might seem odd, it encourages you to keep your whole body in a single plane to avoid collapsing in your lower back or leaning forward (toward your inner thigh) to plant your hand. Here are some tips to modify triangle pose.
- Place your hand on a block, and move the block to a taller side if needed.
- If your hips or hamstrings are tight, move your feet to hips’ distance instead of lining up heel to arch.
How to Make Triangle Pose Harder
Triangle pose is hard already! There are ways to intensify it, but Saunders suggests using trikonasana to tune in to what’s happening in your body.
Ask yourself: “Can you resist gravity and extend the spine? Can you maintain the integrity of your feet, without collapsing? Can you back off a bit when you feel strain in your knee?” If you answered “yes” and want to go even deeper, try these variations.
- Wrap your first two fingers and thumb around your front big toe.
- Rather than plant your hand, let it float above the ground to fire up your obliques.
Beginner’s Tips for Doing Triangle Pose
Triangle pose is a classic for a reason; take your time with it. “Instead of seeking perfection in triangle, this particular pose should be about the journey,” recommends Saunders.
“Use it as a diagnostic tool, to see where you might be tight in the ankles, hamstrings, hips, pelvis, spine, and neck. And then pick one area to work on. Great benefit can be seen in triangle from small changes.”
Here are more tips to help you as you learn triangle pose.
- Avoid collapsing in your lower back. Keep your core engaged, and your spine extended straight out (not down toward your front inner thigh).
- Try not to place much weight on your planted hand, regardless of its position.
- If looking up at your top hand hurts your neck, look down instead.
- Triangle pose should feel like it’s opening your chest, but avoid the urge to lean your top shoulder and arm back.
- Some styles of yoga teach triangle pose with the feet as far apart as they would be in crescent lunge or warrior 1 or 2. Saunders prefers a shorter stance, as it keeps the pelvis in better alignment and avoids overstretching your hamstrings.
Benefits of Triangle Pose
With time, you’ll begin to notice the following advantages of trikonasana within your body.
1. Strengthens lower body and core
In triangle pose, you engage the muscles supporting your ankles, knees, and hips, chiefly the calves, quads, and glutes. Trikonasana also strengthens your obliques and lower back as you work to maintain a straight spine.
2. Stretches nearly your entire body
Triangle pose lengthens muscles all up and down your body, especially the hamstrings and adductors. Plus, your torso gets a side bend (lateral flexion), stretching the obliques.
3. Promotes focus and breathing
Trikonasana also helps you learn to focus amid chaos; there’s so much happening at once physically, and sometimes all you can do is breathe through it.
Take your practice further with BODi’s Yoga52, a collection of 52 elegantly-produced yoga classes from beginner to expert taught by five of the world’s leading yoga instructors.